Mac notes
- Một số lệnh trên terminate
- Một số lệnh sử dụng monitor hệ thống
- Một số thao tác
- Apache
- MySQL sử dụng xampp
- MySQL
- PHP
- Kết nối PHP và MySQL
- vi editor
- Homebrew
- Axel - chương trình hỗ trợ download
- Aria2 - chương trình hỗ trợ download
- p7zip - chương trình nén và giải nén tập tin/thư mục
- unrar - chương trình giải nén tập tin rar
- Excel
- Cài đặt java
- Cài đặt lập trình android
- Phần mềm đọc tập tin chm
Một số lệnh trên terminate
- sudo: thực hiện lệch dưới quyền admin
- ls: liệt kê danh sách tập tin
-
ls tr ‘\n’ ‘\n’
-
- cd: di chuyển tới thư mục
- sudo chmod -R 777 XXX: chỉnh permission của thư mục XXX (-R: bao gồm cả thư mục con)
- chmod +x file: chuyển thành tập tin thực thi được
- sudo chown -R trphloc:admin /directory => thay đổi chủ sở hữu của thư mục
- Tìm vị trí của lệnh: which name
- Thêm đường dẫn tới biến PATH
- export PATH=xxx:$PATH
- Chỉnh sửa tập tin .profile trong thư mục home
- Tạo một liên kết (symbolic link): chi tiết link1 link2
- Di chuyển tới thư mục cần tạo
- ln -Ffhinsv src dis => src: thư mục cần liên kết, dis tên liên kết
- Vd: ln -s /Volumes/Classic/ Classic
- uname -a: thông tin hệ thống
- df -h: thông tin lưu trữ
- source scripts: thực thi scripts
- Hiển thị tất cả tập tin trong Finder (thực thi 2 lệnh sau)
- defaults write com.apple.finder AppleShowAllFiles YES
- killall Finder /System/Library/CoreServices/Finder.app
- Nếu muốn hiển thị bình thường thì chỉnh YES thành NO trong câu lệnh 1
- rm file_name: xóa tập tin
- rm -rf directory_name: xóa thư mục (r: recursive, f: force)
Một số lệnh sử dụng monitor hệ thống
- opensnoop:
- sudo opensnoop -n applicationName
- sudo opensnoop -p PID
- sudo opensnoop -f filename
- Tham khảo: http://osxdaily.com/2010/10/06/monitor-how-and-when-a-process-accesses-files-with-opensnoop/
- Tham khảo: http://dtrace.org/blogs/brendan/2011/10/10/top-10-dtrace-scripts-for-mac-os-x/
Một số thao tác
- Ctrol-Shift-Power: sleep
- Power (2s): hộp thoại sleep/shutdown/restart
- Command-C: copy
- Command-V: paste
- Command-Option-V: paste (cut)
- Command-M: thu nhỏ màn hình
- Command-Tab và phím lên/xuống: để di chuyển đến màn hình đang thu nhỏ
- Command-Shift-3: chụp toàn bộ màn hình (4: chụp 1 phần)
- Danh sách phím tắt: tham khảo
- Delete: chức năng backspace
- Fn-Delete: chức năng delete
- Thay đổi shortcut của chương trình: http://lifehacker.com/5720087/how-to-remap-any-keyboard-shortcut-in-mac-os-x
- Thay đổi paste (cut) thành Control-Command-V: System References => Keyboard => Shortcuts => chọn App Shortcuts => Nhấn dấu + => chọn Finder => điền Move Item Here trong menu tile => chọn phím Control-Command-V trong Keyboard Shortcuts => chọn OK.
Sử dụng các phím F1, F2, … như mặc định
- Trong MAC, dòng phím trên cùng là kết hợp của F1, F2, … và các chức năng. Muốn sử dụng các phím F1, F2, … phải dùng kèm với phím fn
- Để F1, F2, … là mặc định thì chỉnh như sau
- Chạy System Preferences từ Apple menu.
- Chọn Keyboard (hoặc Keyboard & Mouse trong Mac OS X v10.5.8 và các phiên bản sớm hơn).
- Chọn Keyboard, nếu có
- Chọn enable “Use all F1, F2, etc. keys as standard function keys.”
Cấu hình zoom
- System Preference => Accessibility => trong phần bên trái chọn zoom và chỉnh phím tắt cho phù hợp
Apache
- Cài đặt
- Đã được cài mặt định trong mac
- Tham khảo: link
- Sử dụng
- sudo su
- apachectl start: khởi động => chạy localhost sẽ thấy “It works”
- apachectl restart
- Kích hoạt php
- Sao lưu tập tin cấu hình
- cd /etc/apache2/
- cp httpd.conf httpd.conf.bak
- Thay đổi tập tin cấu hình bằng chương trình vi
- vi httpd.conf
- Bỏ dấu # trước dòng LoadModule php5_module libexec/apache2/libphp5.sLoado
- Bỏ dấu # trước module CGI để có thực thi được một số ngôn ngữ scripts khác
- Lưu lại và khởi động lại
- Sao lưu tập tin cấu hình
- Tạo virtualHosts
- “http://localhost/somesite/” liên kết với “/Library/WebServer/Documents/somesite”
MySQL sử dụng xampp
- Tạo symbolic link của tập tin my.cnf
1
| |
MySQL
- Cài đặt
- Download tại trang http://dev.mysql.com/downloads/mysql/
- Cài đặt
- Cập nhật đường dẫn path tới mysql (khi khởi động không cần đường dẫn)
- export PATH=/usr/local/mysql/bin:$PATH
- Sử dụng
- Lệnh mysql để chạy
- Đăng nhập: mysql -u username
- Hiển thị danh sách người dùng (root)
- select * from mysql.user;
- desc mysql.user;
- select host, user, password from mysql.user;
- Tạo người dùng: (root)
- CREATE USER ‘admin’@’localhost’;
- GRANT ALL PRIVILEGES ON . TO ‘admin’@’localhost’;
- Cập nhật mật khẩu: (root)
- UPDATE mysql.user SET Password=PASSWORD(‘YOUR_PASSWORD’) WHERE Host=’localhost’ AND User=’root’;
- Phân quyền cho database
- GRANT ALL ON mydb.* TO ‘someuser’@’somehost’;
- Tạo cơ sở dữ liệu: create database name
- Khởi động nhanh server: sudo /usr/local/mysql/support-files/mysql.server start (nếu cập nhật path thì không cần đường dẫn)
- Dừng: sudo /usr/local/mysql/support-files/mysql.server stop
- Khởi động lại: sudo /usr/local/mysql/support-files/mysql.server restart
- Bật log để theo dõi các thay đổi trên mysql (tất cả)
1 2 3 | |
1 2 3 | |
- Một số lỗi:
- Warning: mysql_connect(): [2002] No such file or directory
- Nếu có /tmp/mysql.sock và không có /var/mysql/mysql.sock
- cd /var
- sudo mkdir mysql
- sudo chmod 755 mysql
- cd mysql
- ln -s /tmp/mysql.sock mysql.sock
- Nếu không có /tmp/mysql.sock và có /var/mysql/mysql.sock
- cd /tmp
- ln -s /var/mysql/mysql.sock mysql.sock
- Tham khảo: http://stackoverflow.com/questions/4219970/warning-mysql-connect-2002-no-such-file-or-directory-trying-to-connect-vi
- Nếu có /tmp/mysql.sock và không có /var/mysql/mysql.sock
- Lỗi trên không cần sửa => có thể start mysql trong System References
- Tham khảo:
- http://stackoverflow.com/questions/1676688/php-mysql-connection-not-working-2002-no-such-file-or-directory
- http://stackoverflow.com/questions/26514757/how-to-get-mysql-server-working-after-osx-yosemite-upgrade/26523977#26523977
- Tham khảo:
- Warning: mysql_connect(): [2002] No such file or directory
PHP
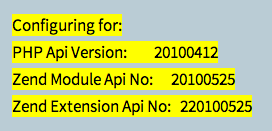
- Cài đặt 5.5 link
-
curl -s http://php-osx.liip.ch/install.sh bash -s 5.5
-
- Cài đặt mcrypt
- Cài đặt Xcode command line tools (nếu chưa có): xcode-select –install
- Tạo thư mục mcrypt trong thư mục home
- cd ~
- mkdir mcrypt
- Download libmcrypt từ sourceforge hoặc phiên bản 2.5.6
- Vào thư mục mcrypt, giải nén tập tin mới download và xóa tập tin nén
- cd ~/mcrypt
- tar -zxvf libmcrypt-2.5.8.tar.gz
- rm *.gz
- Vào thư mục libmcrypt và cài đặt
- cd ~/mcrypt/libmcrypt-2.5.8
- ./configure
- make
- sudo make install
- Tải Autoconf và cài đặt
- Tải tại đường dẫn http://ftp.gnu.org/gnu/autoconf/autoconf-latest.tar.gz hoặc tại đây
- Giải nén vào thư mục ~/mcrypt
- cd ~/mcrypt/autoconf-2.69
- ./configure
- make
- sudo make install
- Biên dịch mcrypt php extension
- Tải src của php tại đường dẫn http://php.net/releases/index.php hoặc tại đây
- Giải nén vào thư mục ~/mcrypt
- cd ~/mcrypt/php-5.5.16/ext/mcrypt/
- /usr/bin/phpize => Kết quả:
- ./configure
- make
- sudo make install => Kết quả:

- Kích hoạt mcrypt.so hay một số module khác của php
- Mở tập tin /etc/php.ini (nếu chưa có thì copy từ /etc/php.ini.default
- Thêm dòng “extension=mcrypt.so”
- Khởi động lại apache => sudo apachectl restart
- Tham khảo: 10.7 và 10.8 hoặc 10.9
Kết nối PHP và MySQL
- Sư dụng các lệnh sau (phải chạy dưới quyền root)
- cd /var
- mkdir mysql
- cd mysql
- ln -s /tmp/mysql.sock mysql.sock
vi editor
- Sử dụng
- Bắt đầu: vi tentaptin
- Thoát và lưu: ZZ hoặc :wq
- Thoát và không lưu: :q
- Lưu: :w
- Di chuyển trang
- G - di chuyển tới dòng cuối cùng trong tập tin
- xG - di chuyển tơí dòng x
- ^F - pagedown
- ^D - pagedown
- ^U - pageup
- Thêm
- r - thay ký tự ngay con trỏ bằng ký tự liền sau
- i - thêm trước con trỏ
- a - thêm sau con trỏ
- A - thêm vào cuối dòng
- Xoá
- x - xóa ký tự ngay con trỏ
- dd - xóa dòng ngay con trỏ
- dw - xóa từ ngay con trỏ
- db - xóa từ trước con trỏ
- Tìm kiếm
- ? - tìm từ phía sau
- / - tìm từ phía trước
- Tham khảo
Homebrew
- Chạy lệnh sau trong terminal
1
| |
- Tham khảo: http://brew.sh/
Axel - chương trình hỗ trợ download
Cài đặt
- Phải cài đặt homebrew trước, thực thi lệnh sau
1
| |
Sử dụng
- axel url
- Ví dụ: axel -n 10 http://example.com/some_file.mov
Aria2 - chương trình hỗ trợ download
Cài đặt
- Phải cài đặt homebrew trước, thực thi lệnh sau
1
| |
Sử dụng
- aria2c [options]
- Một số tham số
1
| |
1
| |
1
| |
1
| |
1
| |
1
| |
1
| |
p7zip - chương trình nén và giải nén tập tin/thư mục
Cài đặt
- Phải cài đặt homebrew trước, thực thi lệnh sau để cài đặt
1
| |
- Tạo symbolic link trong thư mục /bin bằng lệnh sau
1
| |
Sử dụng
- 7za x a.zip -o* => giải nén tập tin a vào thư mục a
1 2 3 4 5 6 7 8 9 10 11 12 13 14 15 16 17 18 19 20 21 22 23 24 25 26 27 28 29 30 31 32 33 34 35 36 37 38 39 40 41 42 43 44 45 46 47 48 | |
unrar - chương trình giải nén tập tin rar
Cài đặt
- Phải cài đặt homebrew trước, thực thi lệnh sau để cài đặt
1
| |
- Tạo symbolic link trong thư mục /bin bằng lệnh sau
1
| |
Sử dụng
1
| |
Tham khảo
- http://best-mac-tips.com/2013/02/02/extract-rar-archive-command-line-mac-terminal/
Excel
- Ctrl-U: sửa ô hiện hành
- Command-T: chuyển đổi địa chỉ trong công thức thành tuyệt đối, tương đối
Cài đặt java
- JDK 7
- JavaForOSX2014-001 => http://support.apple.com/kb/DL1572?viewlocale=en_US&locale=en_US
Cài đặt lập trình android
- Android studio: http://developer.android.com/sdk/index.html
- Virtual box: https://www.virtualbox.org/wiki/Downloads
- Genymotion: https://www.genymotion.com/#!/
Phần mềm đọc tập tin chm
- Tên phần mềm: ichm
- Link: https://code.google.com/p/ichm/